| PanoramIX Mini Pan Head | |
| Pan Head Calibration | |
| PanoramIX Links | |
PanoramIX Mini Pan Head
|
The PanoramIX Mini Pan Head is a simple device that may be used to improve the quality of panoramic scenes created from ordinary photographs. This device can be attached to a standard tripod. Your camera is then mounted on the slotted portion of the pan head. A device like this is needed when the scene contains any visible objects close to the camera. If the nearest object is more than 30 meters or 100 feet away, a pan head such as this is not needed. In such cases, you do not even need a tripod. A hand-held camera may be used to create a panoramic image of the scene. If the nearest object is less than 30 meters or 100 feet from the camera, the camera should be mounted on a tripod to insure consistency between overlapping photos. If the nearest object is more than 10 meters or 30 feet, then you can still get by without a pan head. If the nearest object is less than 10 meters or 30 feet from the camera, then a pan head such as this should be used to improve the consistency between overlapping images. Types of Cameras
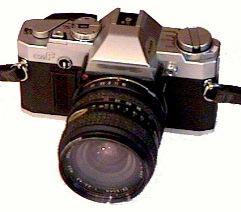
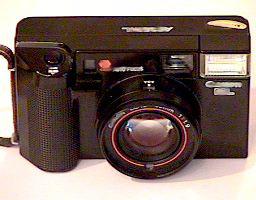
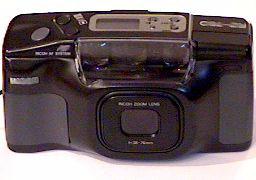
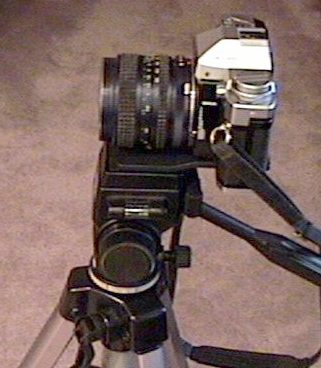
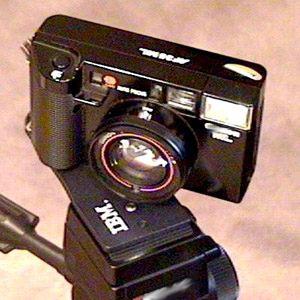
The PanoramIX pan head may be used with a wide variety of cameras including 35mm "SLR" cameras such as the one shown above, and simple "point and shoot" cameras such as those shown below. The PanoramIX pan head may also be used with many popular digital cameras, as long as they have a standard mounting hole on the bottom.
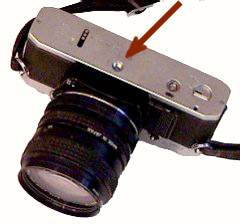
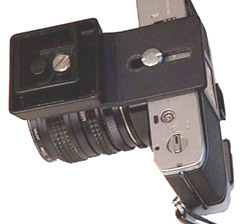
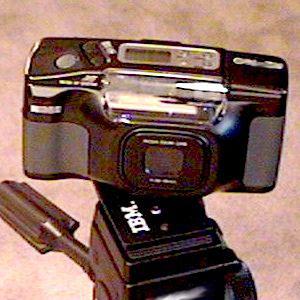
SLR cameras are bigger and heavier than the "point-and-shoot" cameras, and they may require more thinking to operate. These cameras, however, can accept a wide variety of interchangeable lenses, including very wide angle lenses which are most useful for capturing panoramic scenes. Lenses with a focal length of 28mm and 65 degree field of view are very common, and it is possible to get lenses with focal lengths of 24mm, 21mm, 18mm, etc. for even wider fields of view. Such lenses are good for capturing a large vertical range. The lenses used with 35mm SLR cameras can often be used in more challenging lighting conditions than can be handled with the "point-and-shoot" cameras. In addition, with SLR cameras, the viewfinder shows you the scene through the same lens used to take the picture, so you see exactly what will be recorded on the film. This is very helpful for calibrating the way the camera is attached to the PanoramIX Mini PanHead. Point-and-shoot cameras are compact, light, and nearly fool-proof. However, you are stuck with the lens that comes with the camera, and these are generally not able to give a very wide field of view. A 38mm setting on a zoom lens, providing a 50 degree field of view, is the typical limit for wide-angle capabilities in these cameras. In addition, since the viewfinder does not look through the same lens used by the film, you cannot tell what the film will see, especially if there are any objects up close to the camera. The lens on each camera may be approximated by a "virtual pin-hole". In order to avoid parallax errors when shooting multiple images for a panoramic scene, the camera must be rotated about this virtual pin-hole. Unfortunately, the standard means of mounting a camera on a tripod do not provide for rotation of the camera about this virtual pin-hole. The Mounting HoleExcept for the cheapest disposable models, nearly all cameras include a standard mounting hole on the bottom. This hole accomodates a screw 1/4 inch in diameter and up to 1/4 inch long. For 35mm SLR cameras such as the one shown below, the mounting hole is typically in the center of the bottom, directly in line with the lens. These cameras are relatively heavy and the central location of the mounting hole helps to balance the weight of the camera on the top of a tripod. The image below on the left shows the mounting hole on the bottom of a 35mm slr camera. The image on the right shows the same camera with the PanoramIX Mini Pan Head attached. The side of the Mini Pan Head with the slot and screw is attached to the bottom of the camera. The other end, with the guide-pin hole and threaded hole, is attached to a clip-on tripod head. In this case, the Mini Pan Head is aligned parallel to the axis of the lens.
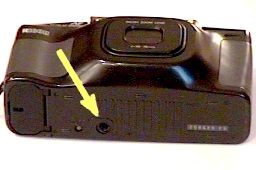
For compact "point and shoot" cameras, the mounting hole is usually located off to one side. These cameras are much smaller and lighter than the SLR models, and they can easily hang off to one side when mounted on a tripod. The following images show the mounting holes in the bottoms of the two "point-and-shoot" models shown above. Notice that the mounting holes are not near the center of the bottom, and they are not in line with the lens.
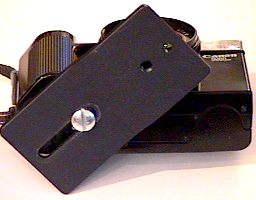
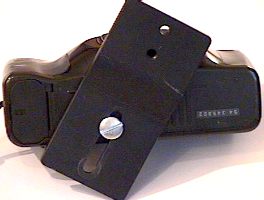
Each tripod has a vertical rotation axis. Using the tripod's pan and tilt arm to turn (pan) the camera rotates the camera about this axis. This axis is usually close to the screw that fits in the mounting hole on the bottom of the camera. In the case of an SLR camera, the virtual pin-hole for the lens may be located 1" to 3" away from the tripod axis, leading to parallax errors in overlapping images. This requires a front-to-back adjustment to align the lens with the axis of the tripod. In the case of a "point-and-shoot" model, the lens is much smaller and closer to the body, but the mounting hole has been displaced to the side. In this case, a lateral adjustment is needed to align the lens with the axis of the tripod. This can be accomplished by mounting the camera on the pan head in a diagonal manner, as shown below
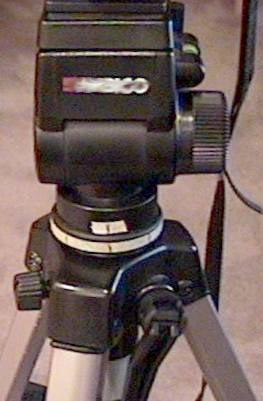
Mounting on a TripodThe image on the left below shows a typical tripod with a detachable mounting head and a bubble level. The bubble level is very useful for making sure the rotation axis of the tripod is really vertical. Otherwise, the rotation axis will be tilted and the panorama will look inebriated. Adjust the legs of the tripod, not just the tilt control, to make sure the tripod head is level. Make sure the head is still level after rotating by 90 180, and 270 degrees. The detachable mounting head has a spring-loaded guide pin and a 1/4"-20 mounting screw. Most cameras do not use the guide pin. 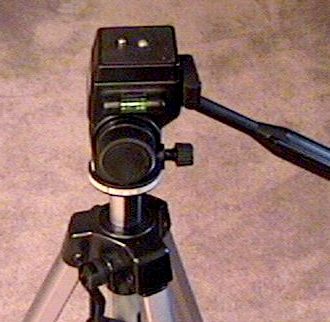 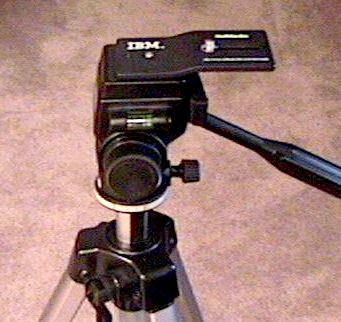 The PanoramIX Mini Pan Head has an unthreaded hole for the guide pin and a threaded hole that fits the mounting screw on the head of the the tripod. Detach the tripod head from the tripod and screw the mounting screw into the PanoramIX Mini Pan Head until snug. Make sure the the guide pin in the tripod head fits into the guide pin hole in the PanoramIX Mini
  Rotating the Camera
A standard lens for a 35mm camera will have a focal length in the range of 45mm to 55mm. A lens with a focal length greater than this is considered a telephoto lens. You do not want to use a telephoto lens for creating a panorama. Lenses with focal lengths less than 45mm are considered to be "wide-angle" lenses. Many common zoom lenses can go as far as 38mm. Interchangeable lenses with focal lengths as low as 13mm are available for 35mm SLR cameras, but lenses with focal lengths less than 24mm can be very expensive. Although it is possible to build a full 360 degree panorama using an ordinary camera with a standard lens, the resulting panorama has such a small vertical field of view that there is very little opportunity to move the view direction up or down. In order to provide freedom to move the view direction up and down, the vertical field of view should be made as large as possible. This requires using a wide-angle lens with the smallest possible focal length. Landscape orientation
The vertical field of view can be made even larger by turning the camera so the long axis of each image is vertical. This is called "portrait orientation". The problem with portrait orientation is that most cameras do not have a mounting hole on the side. The PanoramIX Mini Pan Head does not support portrait orientation, unless your camera has a mounting hole on the side. Some tripod allow the head to flipped over to support a camera in the portrait orientation, but this is not helpful if the resulting configuration does not allow the camera to be positioned over the tripod axis of rotation. Portrait orientation
All images in this page were created by William L. Luken. All items visible in these images are the personal property of William L. Luken or Robert H. Wolfe.
Created Oct. 14, 1998. Updated January 11, 1999; July 11, 2001; October 11, 2002; January 27, 2006, June 5, 2103. |